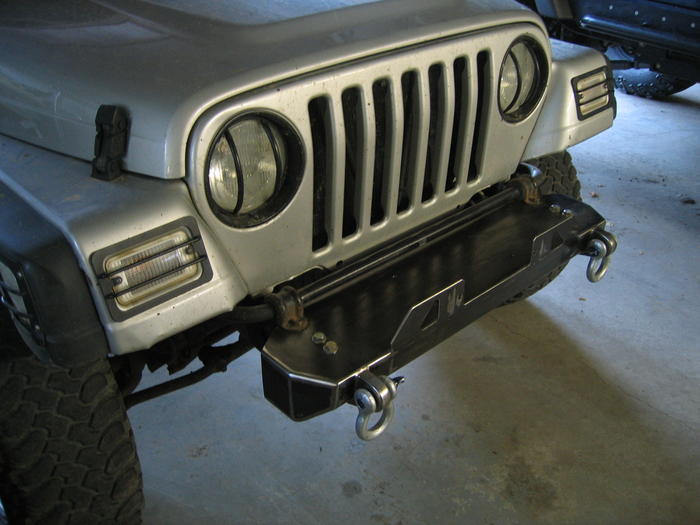
I’ve completed my front bumper. All that’s left to do is drill holes to mount the winch once I figure out what winch I will be using, and paint it.
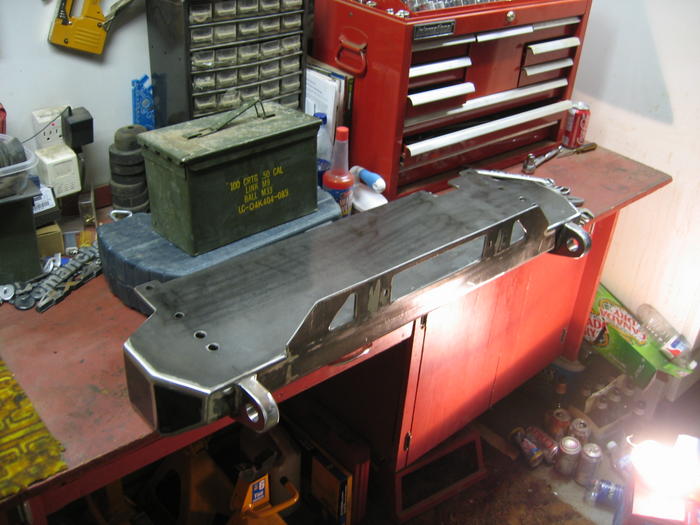
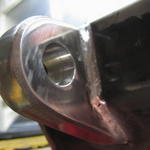
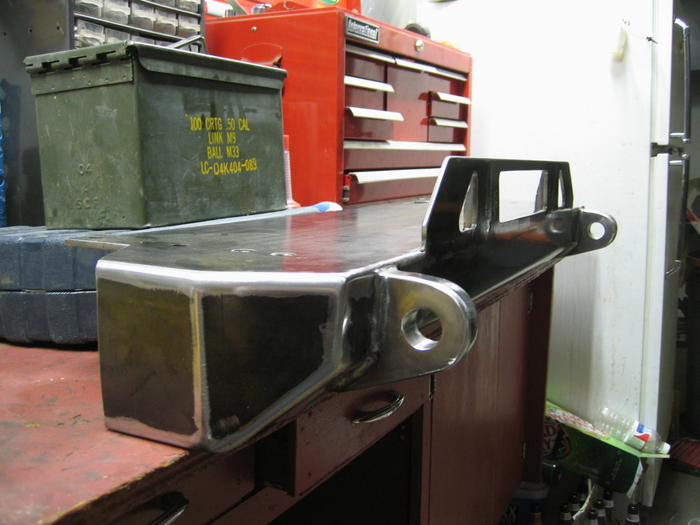
The bumper is made from 3/16″ 44W steel. The top plate/winch plate is 1/4″ 44W steel. The clevis tabs are 1″ QT100 plate, and they have 1/4″ backing plates behind the 3/16 portion they are welded to. Essentially making them a 1″ tab welded to 7/16″.
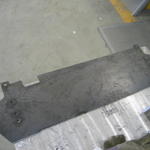
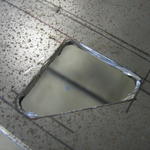
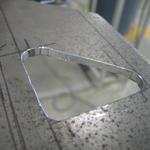
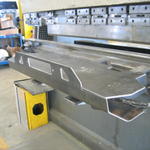
The thinner parts were all sheared, then I used a zip disc on a grinder to do all the intricate cutting that I could not get with the shear. I then drilled holes in the corners of the cut out parts, and played connect the dots with a zip disc. Once that was done I cleaned up the cut outs with a die grinder, and then drilled all the holes for mounting.
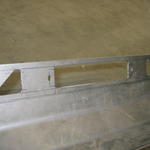
I formed the 3/16″ plate on the press brake at work, then had it all tacked together. The 1″ thick tabs were torch cut by hand, then cleaned up with a sanding disc on a grinder. I then drilled 1″ holes in them to fit a 3/4″ D shackle with a 7/8″ pin. They got welded on, and I spent a while cleaning it all up, grinding and sanding all the welds smooth on the outside. Everything is stitched inside as well.
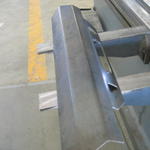
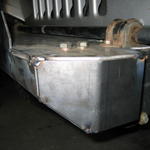
The bumper is 38 3/8″ wide, and will fit any standard lay-down style winch up to 10,000 lbs. It’s designed in such a way that you cannot remove the winch without taking off the bumper. This is to prevent theft. It’s also got a total of 10 mounting locations to make a really solid mount. It mounts to the stock 6 locations at the frame as well as the stock swaybar mounts. The sway bar is still use-able with this bumper, you just simply mount it on top of the bumper, 1/4″ higher than it normally sits.
I’m very pleased with the results! It’s nice to pick and choose all the features you want in a bumper and just build it instead of having to sacrifice something to get a pre-built bumper from a manufacturer. I’ll have it mounted and be able to post up some final shots of it soon. I still need to get the tube-work done that is shown in this photo, but that will have to wait for a later date when I can make a trip down to Sylvan Lake to a friends place who has a bender. I’ll be getting it done at Brink’s place, otherwise known as Brink Fab. Although the installation is as easy as combing your hair I’ll post up a write-up for that too. It’s a very “bolt-on” addition.
The original post about this particular design, along with the 3D drawings I made of it can be seen here: