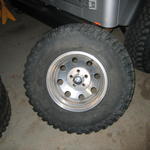
In every wheelers life, there will come a time when you need or want new tires. Or maybe you got new wheels, either way you’re looking at a fairly hefty bill to get them put on for you. A tire shop usually charges around $25/tire for mounting and balancing. I decided to try and do it myself this time, as I already had a pretty good idea of what to do.
Tools:
- Hi-lft jack
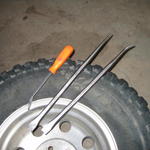
- Two or more good sized pry bars
- Dish soap
- Air compressor
- Ratchet strap
- Floor jack
- Jack stand
- Tire iron
Parts:
- A box of 6000+ BBs
Time:
- 25 minutes per tire
1: To start off I’m going to warn you of a couple things right off the bat. Firstly, this is not easy and will take some elbow grease to get done. Secondly, if you are working with nice shiny new wheels you may want to get some practice on some older ones before you continue. It’s very easy to mark up the rims when doing this, especially if you’re doing it with aluminum rims or small bias ply tires which are very tough to get off the rims. If you’re like me and your rims edges are already marked up, and you don’t mind a few more, then read on.
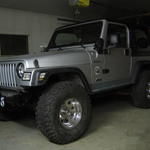
2: Start off by cracking the lug nuts on the first tire you intend on working on, then jack that tire off the ground and place a jack stand in an appropriate place to keep it off the ground. Remove the lug nuts, and remove your tire/wheel from your Jeep TJ.
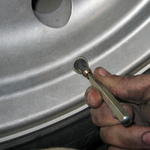
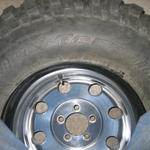
3: Let all the air out of the tire. A valve core remover is a great little tool to have around for this because it will speed this up greatly, but it’s not needed. With the tire empty, you are ready to break the bead on it.
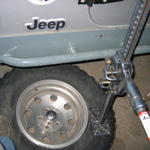
4: This is where your hi-lift comes in handy. Place the tire underneath a place where you can place a large amount of upwards pressure with a hi-lift. The rim must be placed shiny side (or outside) up! Another jeep with a strong bumper or rockers to jack to is the best way. I did it on my own rockers with one tire on a jack stand which I would not recommend, but if you are careful and keep a mindful eye not to let your jeep drop off the jack stand you can get away with it. Once again… I do not recommend using your own jeep if it’s not on all four tires! Place the foot of the jack near the bead next to the rim’s edge. Jack up the hi-lift and it will place enough downward pressure on the bead to pop the tire off the rim. Once that is done, flip the tire over and repeat on the other side. Because the rim’s narrower spot is closer to the outside, you may need to do the backside from a couple different locations around the rim.
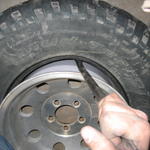
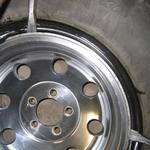
5: Place the tire on the floor with the outside of the rim facing upwards again. If you press downwards on the tire you can see the outside of the rim. See how there is a part of the rim that is narrower inside than the rest? Press downwards on the tire with your knees and get one side of the bead in that narrower section. Then with a pry bar, you’re going to reach down into the opposite side of the tire and pry part of the bead outside the rim. The idea is to get the bead of the tire as far away from the rim edge as possible while you pry on it.
6: Now that we’ve got it started you can use your other pry bar to work your way around the rim, prying the bead of the tire over the rim edge. Don’t try to take on large sections at a time… you need to work your way around in small pieces, and it will take some time to do so. You will find what works best for you. If you find that the tire bead is not staying on the outside once you pry it over, use a third prybar to keep it in place as you go along. Keep working at it until you have one side of the tire completely off the rim.
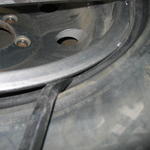
7: Flip the wheel and tire over again. We’re now going to pry the rim out of the tire on the backside. This is done so we can take advantage of that narrower section of the rim again. Start off the same way as you did with the last step. Get one side of the tire in the narrow section of the rim, and pry the tire off from the opposite side. Once you have this done, you can continue prying the rim out all the way around just like the last step. This side is substantially harder to do and it will take some elbow grease to get it out. Once again, there will be a little trial and error here to find what works for you with your set of prybars/tires/rims, etc. After this step, it’s all easy going!
8: With the tire and rim separated, you’re ready to start putting it back together with the new item you’re putting on.. whether it’s a new wheel or tire. Start off by putting the valve core back in rim if you removed it. Now is a really good time to check the beads on the tire and or wheel for damage, dirt, mud, cuts, or anything else that would prevent a good seal. Hit the bead on the wheel and tire with a wire brush to get it ready for a good seal. Use a hammer and chisel to carefully remove all the balancing weights on the wheel. Grab a healthy dose of dish soap and get the bead of the tire lubricated really well. This will make it easy to get back on the wheel, and also aid in seating it later when you’re filling it up with air. My rims had a *LOT* of mud in the beads, and it took a good 15-20 minutes of cleaning per rim to get them clean.
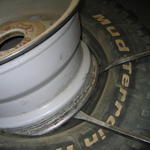
9: Lay the rim on the floor, shiny side up. Place the tire on top (Remember to check that it’s mounted correctly! White or black side out? Is the tire directional?) and push it down onto the bead with your knees. Try to get the first side you place in that narrow section of the rim. With the tire sitting correctly, you should be able to use your knees and hands to get the first side of the tire over the rim by hand without prying at all.
10: Now that it’s half seated, use your prybars to pry the outside bead of the tire onto the rim. You should already know how this is done by now, and this is much much easier than taking it off. Go slow and be patient and you won’t mark up the rims on this step. Now is the time to add BBs if you are planning on balancing them yourself. I won’t get into this topic at all because a google search will net you more than enough information on the topic, and if I were to write about it, it would need it’s own write-up.
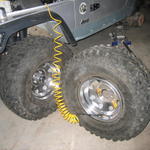
11: Prop the tire and wheel up, and put air to it. Depending on the wheel/tire combo you are using this can be either really easy, or quite tough. I was putting a 12.5″ wide tire on a 8″ wide rim, and I didn’t do anything at all. It simply took air and seated itself. If you’re using a combination that is a little closer together you may need to do a few things here. You can start off by putting a ratchet strap around the circumference of the tire and cinching it up. This places outward pressure on the beads and will help it seat on the wheel. You can also push inward with a small amount of pressure in certain spots on the wheel until you don’t hear the hissing noise of air escaping. This takes a little practice, and possibly a lot of patience. It sometimes helps to have a friend to push in on the other side the same way. I’ve heard horror stories of this being really difficult, but I have never had too much trouble. Once it starts to “take air”, it will sound quieter, and eventually it will pop the bead of the tire into the bead seat of the rim. If you didn’t lube the tire up it can make a really loud BANG when it happens, but don’t be alarmed.
12: Air up the tire to your desired pressure, and mount it back on your Jeep TJ. 95 ft lbs is the correct torque setting. Have a beer and think of the money this is saving you, and dive into your second tire of five.
Now it’s time to go in the house and get on the internet and find the best way to spend the $100 you just saved. It’s a lot of work, but doing this yourself is very satisfying, and I plan on doing my own from now on. You also get the benefit of making sure they are all mounted correctly, instead of having to back to the tire shop at a later date when you notice one of the tires is mounted with the white lettering out! I can imagine you have guessed why I say this. Good luck!