KC is one of most used lights in the offroad industry. They make a good product, have a great warranty, and best of all their lights are easy to take apart, fix, and put back together again. The lights I have for my rig are a 6″ shock mounted Daylighter. The 150w sealed beam Long Range Driving variety. Unfortunately one of my lights only lasted a little less than a year and needed to be replaced. I’m not sure how the warranty works on the bulbs themselves, but rather than contact the company to see if they would ship me a new one, I decided to just spend the $30 CDN and get it done. That way I would have it working for this weekend’s trip to the mountains. A local shop here in Edmonton by the name of Interior Offroad carried the unit. They also had a different type of daylighter that my brother needed due to a fight his lights lost versus a rock and a tree.
Tools:
- Small phillips head screwdriver
- 1/4″ wrench
- Glue gun
- Multimeter
Parts:
- 2x 7/16″ x 2-1/2″ Clevis pins
Time:
- 20 minutes
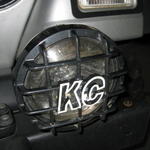
1: Remove any guard you have installed on the font of your lights. I have the optional black rock guards for mine, but most have the yellow smiley covers. You can then use your 1/4″ wrench and phillips screwdriver to remove the two metal rings that hold the large rubber grommet in place.
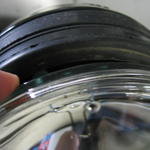
2: Remove the lens from the grommet. You can just slip your fingers around the edge to do this, but be careful not to let it fall out so you don’t damage the wires or connectors on the back of the lamp.

3: Reach inside the casing and disconnect the connectors that run to the back of the lamp. This will be a little different on each unit depending on the type of daylighter you have, but in either case it should be two push-on electrical connectors that will just pull out. Now is also a good time to make sure you know exactly what type of KC you have. Most of them have a number on the front of the glass (usually 4 digits), but mine did not. On the backside of my lamp it was listed however.
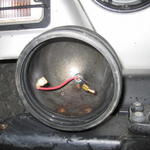
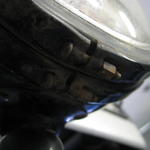
4: You can then pull the rubber grommet off. With everything disassembled you will quickly be able to tell if it was leaking anywhere. They don’t leak very easily through the front grommet, but they will leak through the back of the unit where the wires come in. Now would be a good time to clean everything to help it seal when you put it back together. You could also use a hot glue gun to dab some glue on the inside of the casing where the wire comes in to seal it there if it was leaking on you. This will also help the metal loom on the wire from slipping out of the rubber seal on the back which results in a nice hole for water and mud to flow in. You can see in this picture that mine leaked through the back. I cleaned all the mud out of there, but there is a little rust in there now which could have been prevented by making sure that metal loom in the back never comes loose.
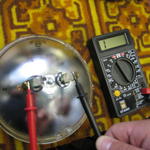
5: If you’re not 100% sure it’s the bulb that’s burnt out and think it may be something else, there is a simple way to check. I had previously checked the wiring to the light with a test light so I was fairly certain that my wiring job was still ok. The filament in the sealed beams like mine may not *look* burnt out like a conventional light bulb though. To test this I grabbed the multimeter and set it to the “continuity” setting. You can then touch the leads of the multimeter to the negative and positive ends on the lamp casing to see if there is any connection there. My old lamp did not pass the test so I knew it was a burnt out filament. My brother’s were not a sealed unit like mine, so it is a little different, but it all works the same. KC also has a reference chart here that will help you out if you need to purchase a new lens/bulb.
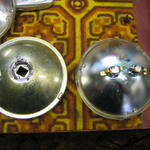
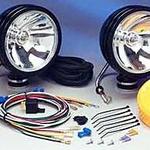
6: Now you’re ready to put it all back together. All the steps are described well enough already so I won’t waste my breath too much here. Put the rubber grommet back in, hook up the bulb/lens and push it gently back into the grommet, then attach the two metal rings around the grommet again. Now would be a good time to point your lights at a good flat surface and aim them according to your preference and or the directions that came with them. In the picture to the right you can see there is some differences in some of the daylighters. My brother’s are a 130w driving light, which is a non-sealed beam (left). Mine are a 150w long range driving light which is a clear lens, and sealed beam (right).
With your KCs now running in top shape you’re ready to do a little night wheeling! Hopefully they will seal properly for you, and you can run them for many trouble free years. If you’re having troubles that are not the lens or bulb, I would recommend you first check the in-line fuses you installed with them, and then work from there with a test light to see where the break in your current is. It may be an issue with your switch or the connectors on it, the relay, or the wiring itself.